
Settings
Retail Point of Sale (POS) Application Settings
This documentation will guide you on how to use the application and customize its settings to suit your business needs. Instead of watching a video tutorial, you can read through the instructions provided below.
Accessing the Settings Menu
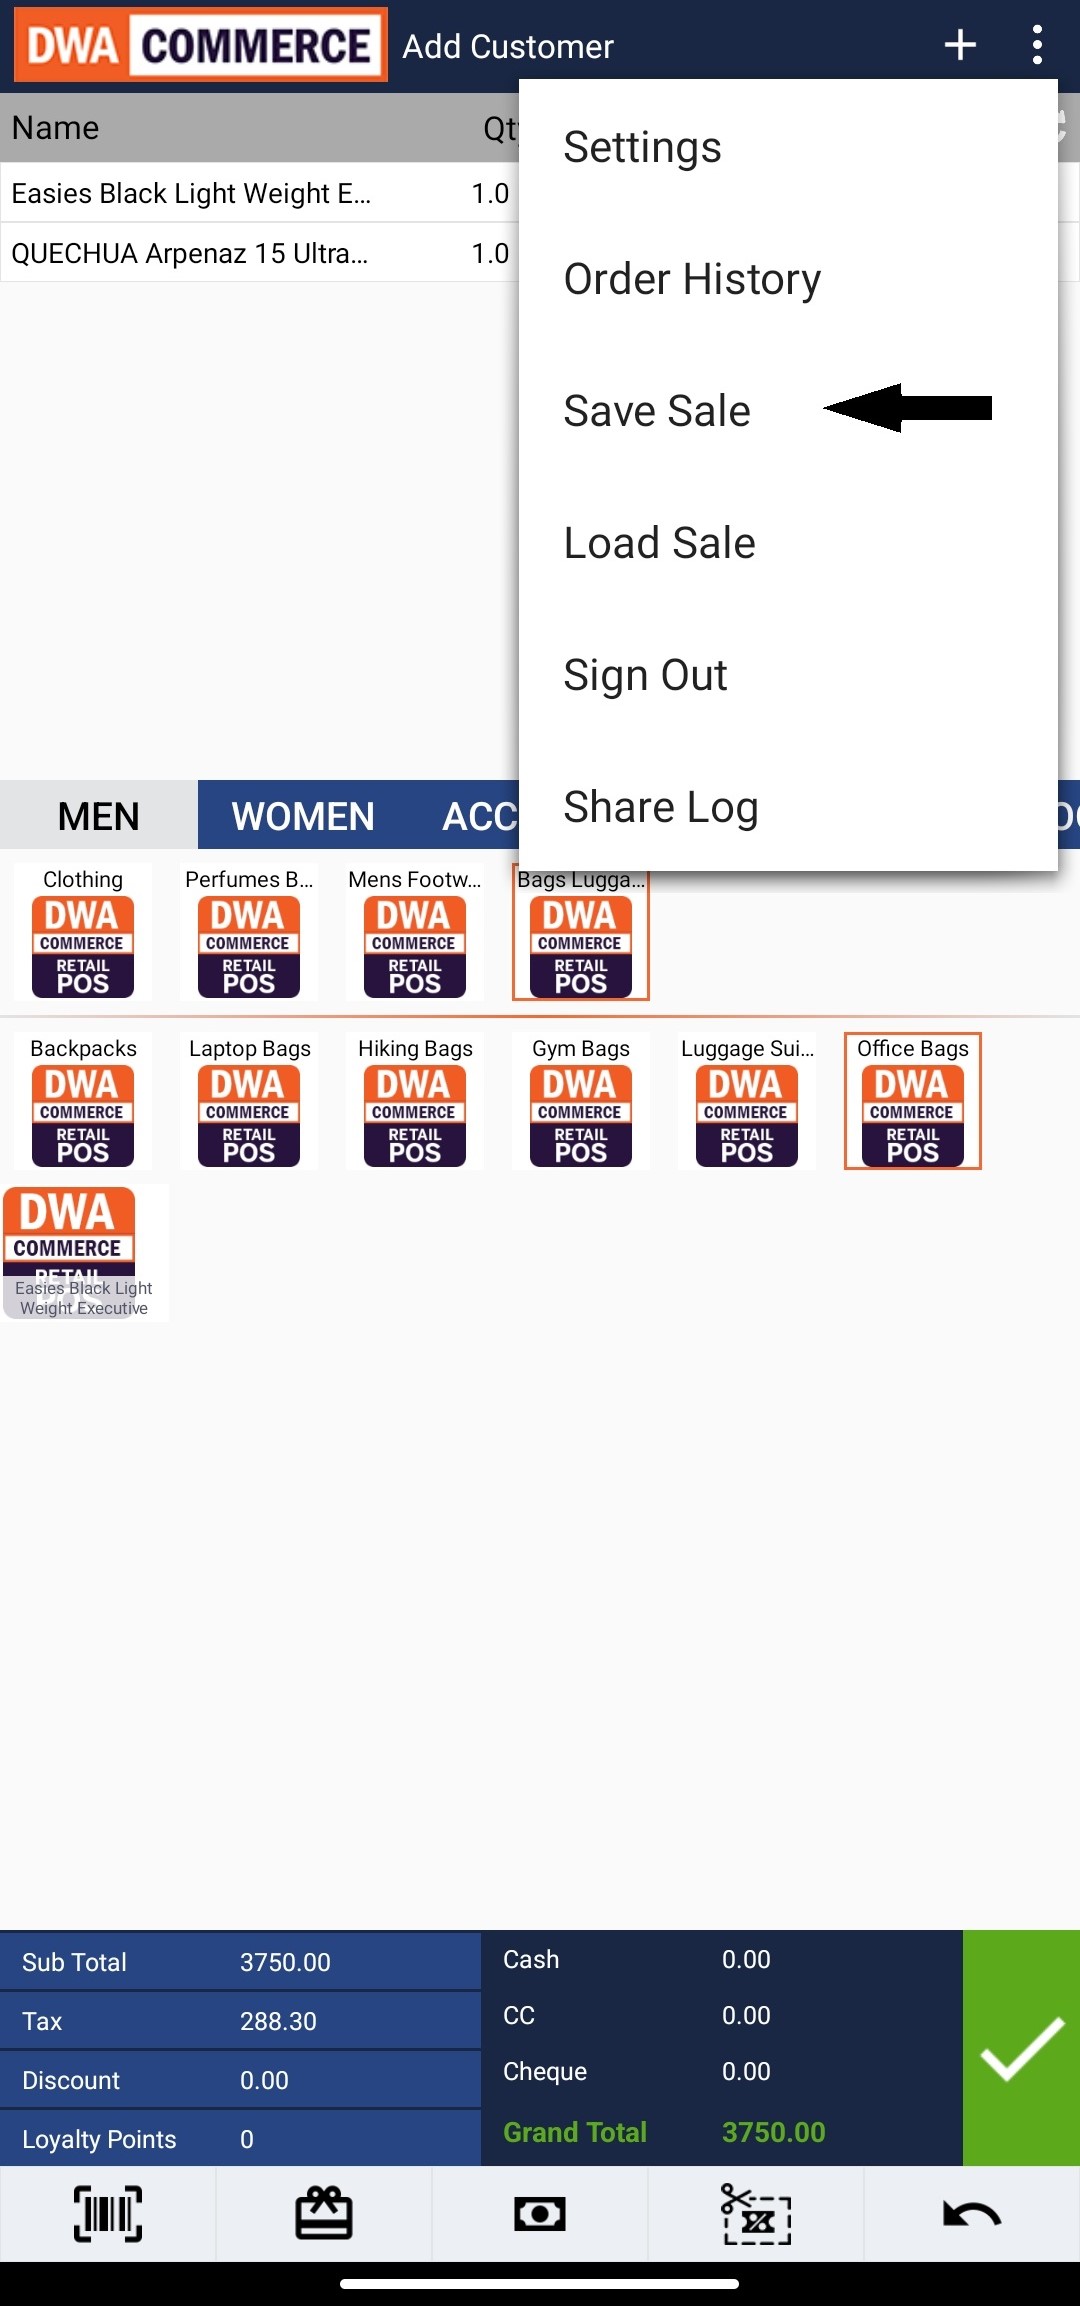
- Click on the three dotted icon located in the header of the application on the right side of the screen. The settings options is present inside .
- Once you have opened the menu upon clicking on the icon, click on the "Settings" option.
" style="width: 35%;" />
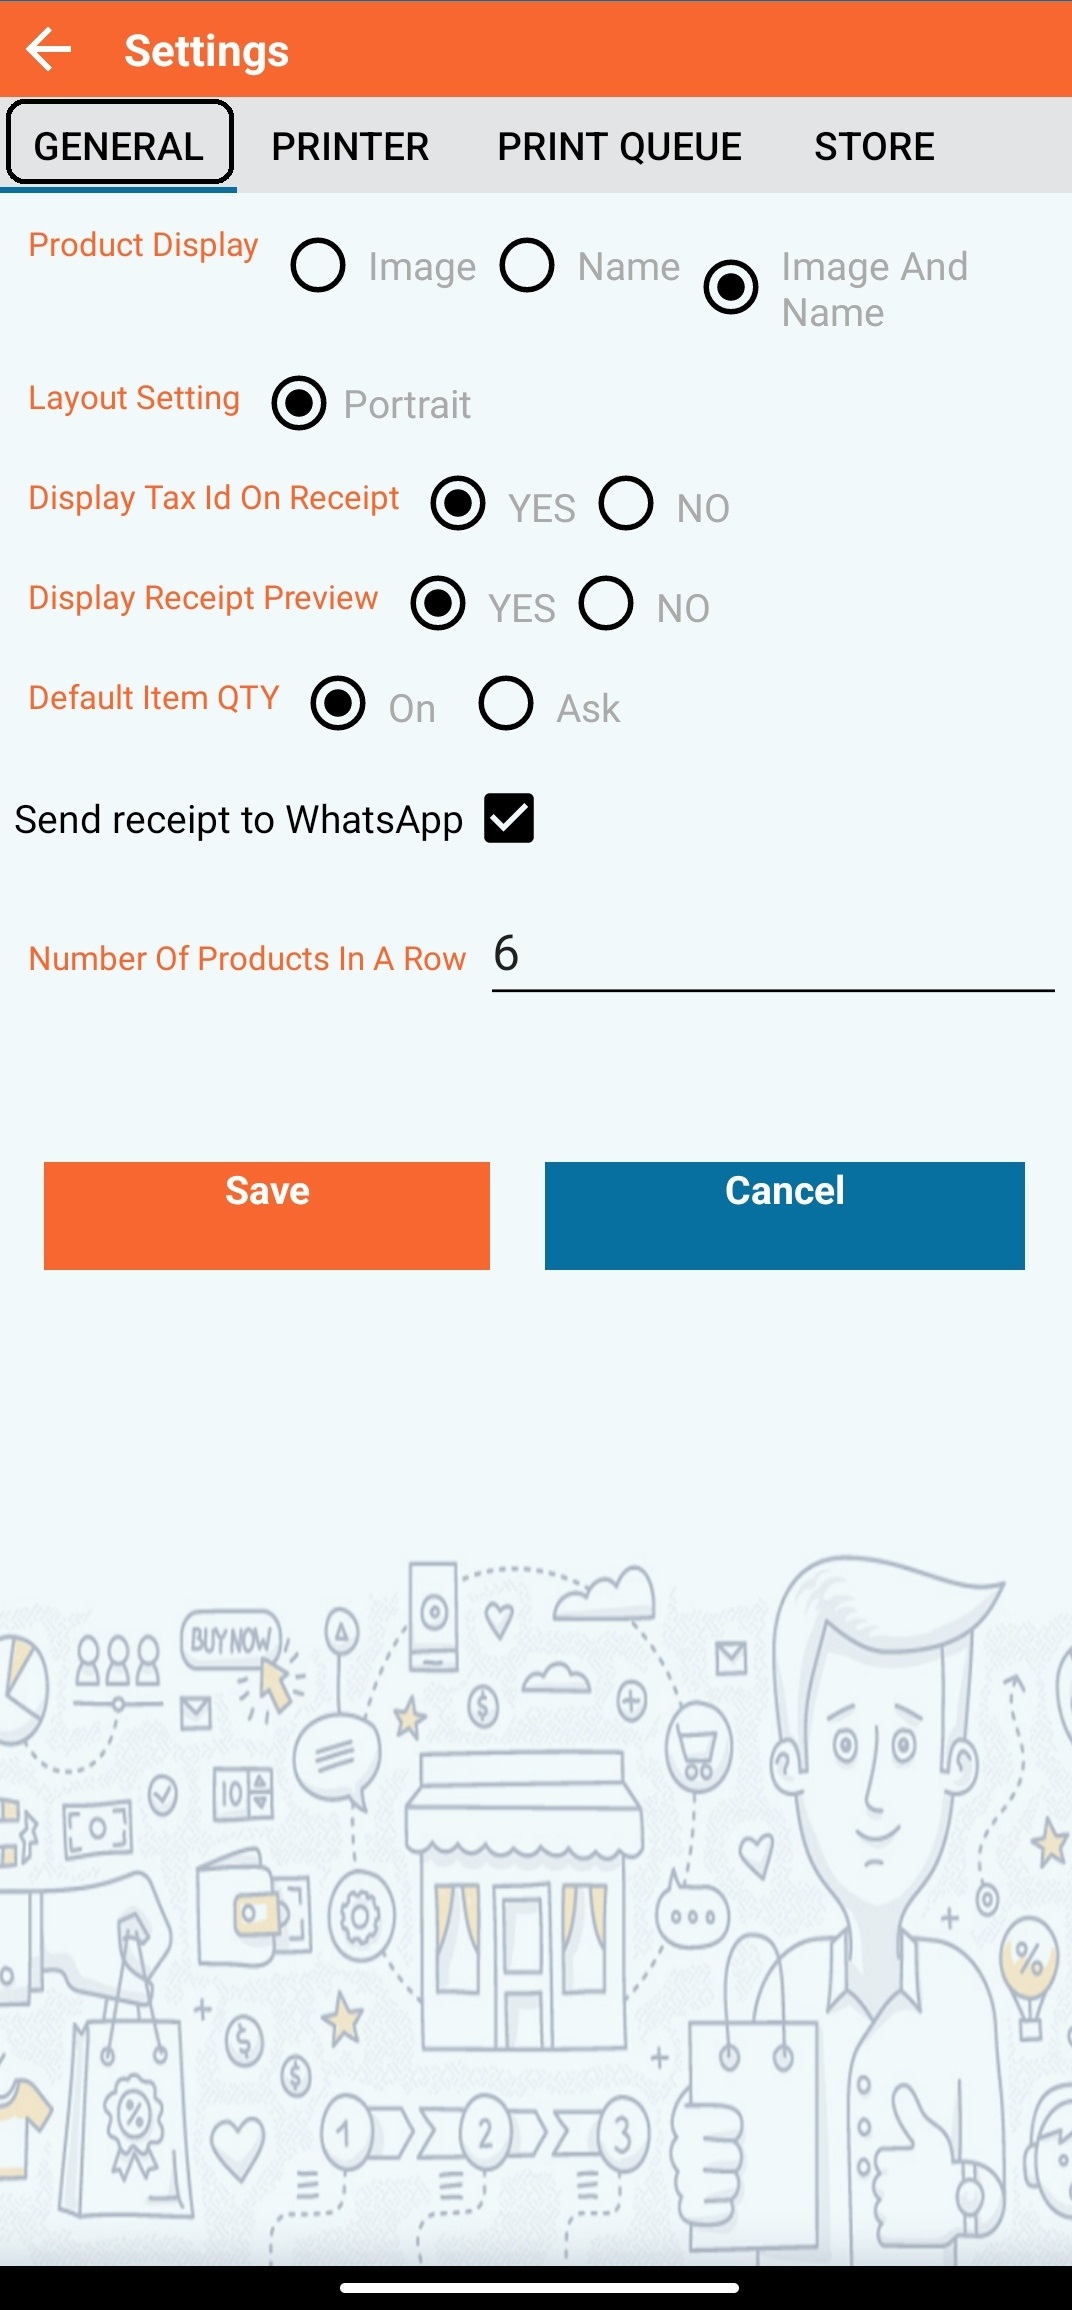
General Settings
- Product Display: Choose whether to display the product name, image, or both in the product listing.
- Application Layout: Customize the layout of the application. Currently, the only layout option available is Portrait.
- Tax ID: Choose whether or not to display the tax ID on receipts by selecting "Yes" or "No".
- Receipt Preview: Enable or disable the receipt preview by selecting "Yes" or "No".
- Default Item Quantity: Set the default item quantity when adding products to the cart. Selecting "On" will automatically add a default quantity of 1 to the cart whenever a product is selected. Selecting "Ask" allows you to specify the quantity each time a product is added to the cart.
- Send Receipt to WhatsApp: If you want to send a copy of the receipt to the customer's WhatsApp, check the "Send receipt to WhatsApp" checkbox. Note that the customer must be added to the application to receive the receipt copy.
- Products per Row: Choose the number of products to be displayed in a row. The current setting is four, but you can change it to any other number. Simply enter the desired number and click "Save" to apply the changes.
Printer Settings
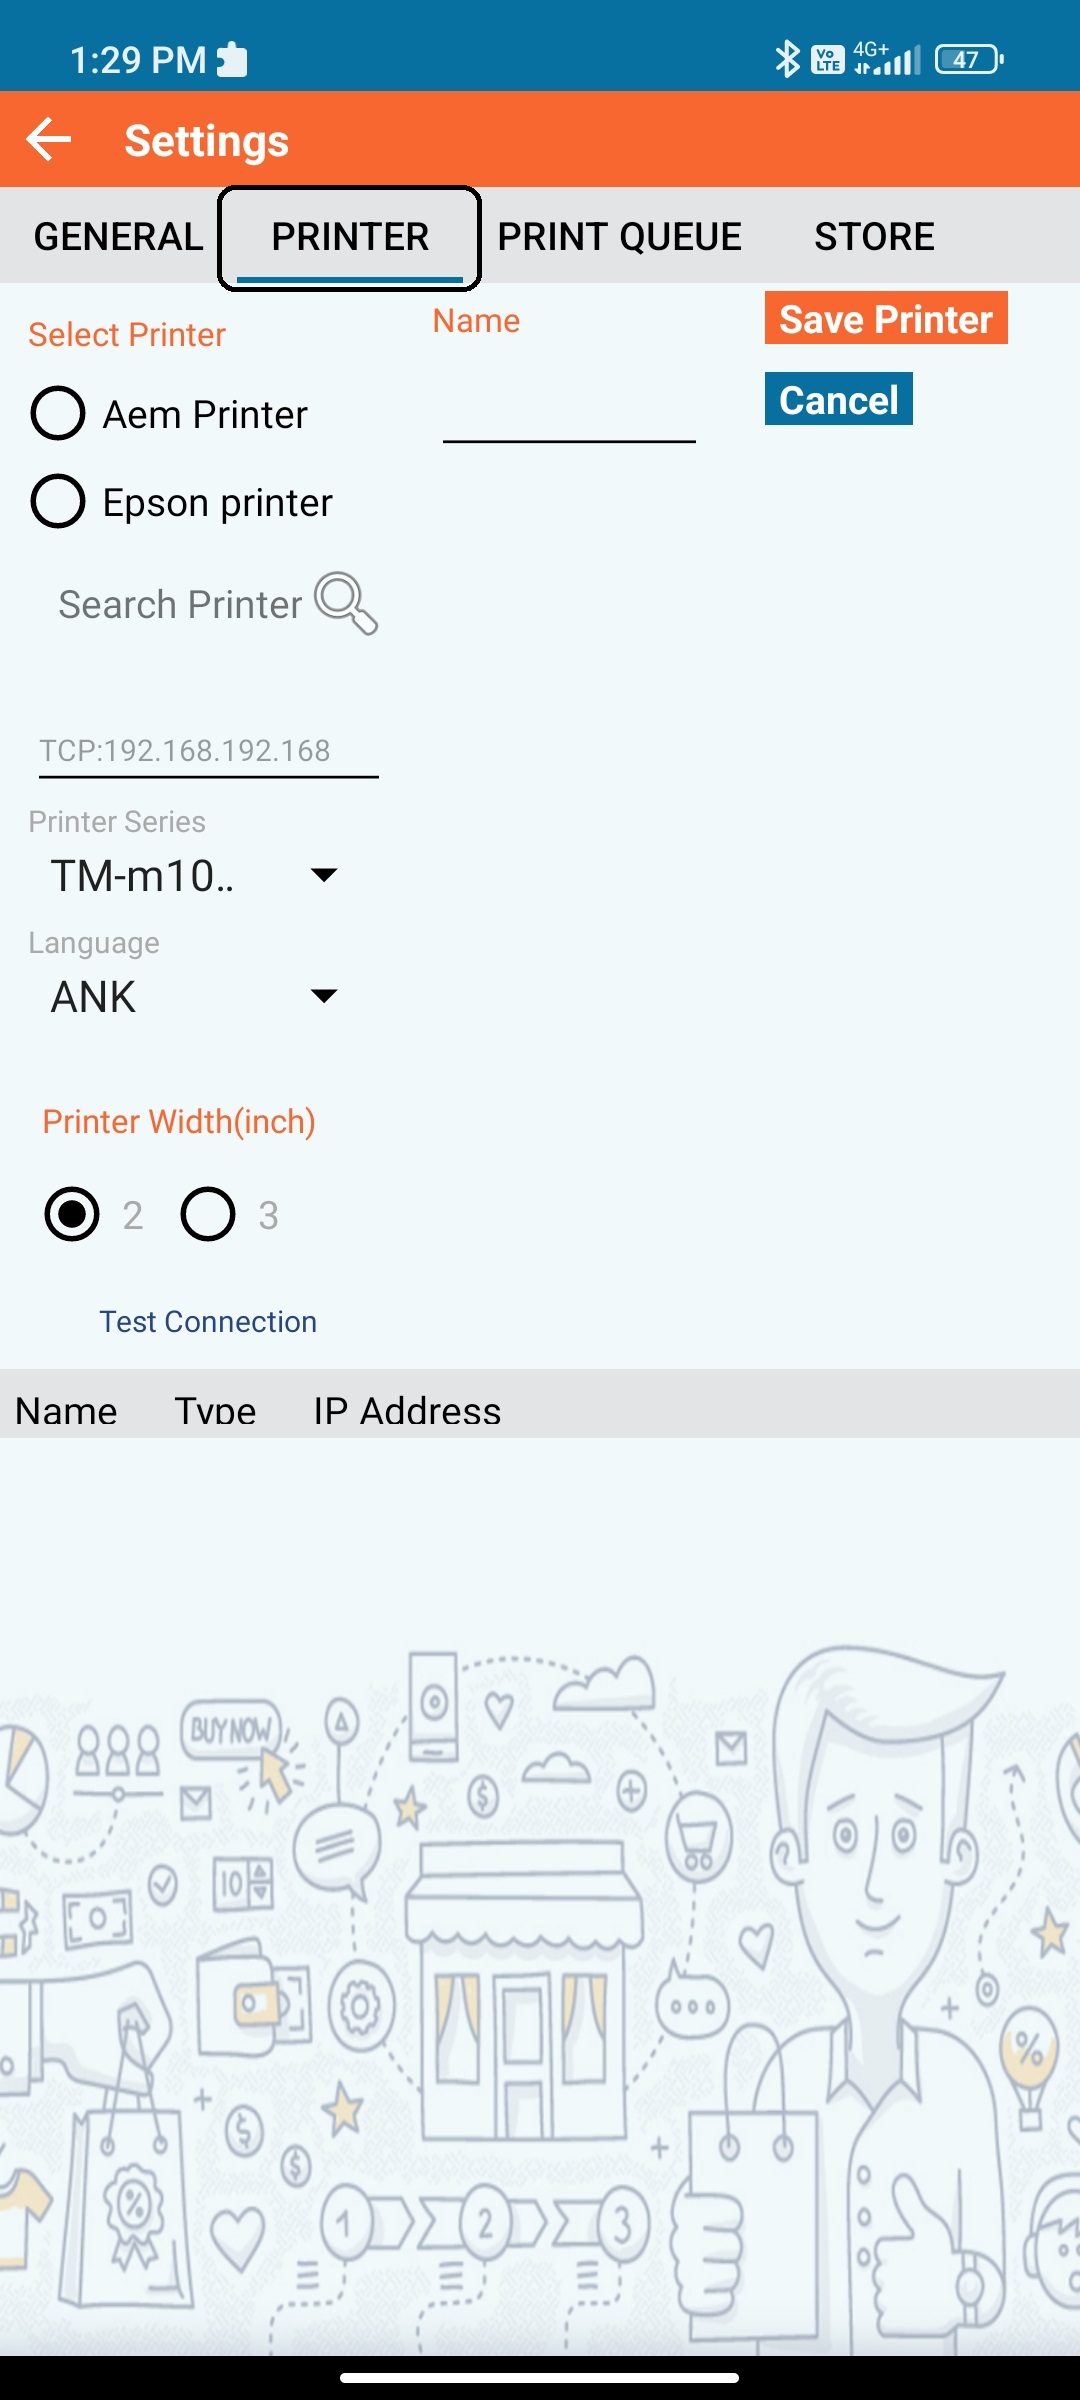
- Click on the "Printer" option in the settings menu.
- To add a new printer, click on the "Add Printer" button.
- Select the printer type (e.g., Epson printer) and provide a name for the printer (e.g., Printer1).
- Enter the printer's IP address.
- Select the printer series from the multi-select option.
- Select the language type (e.g., AK for most needs).
- Choose the printer width.
- Click on "Save Printer" to add the printer.
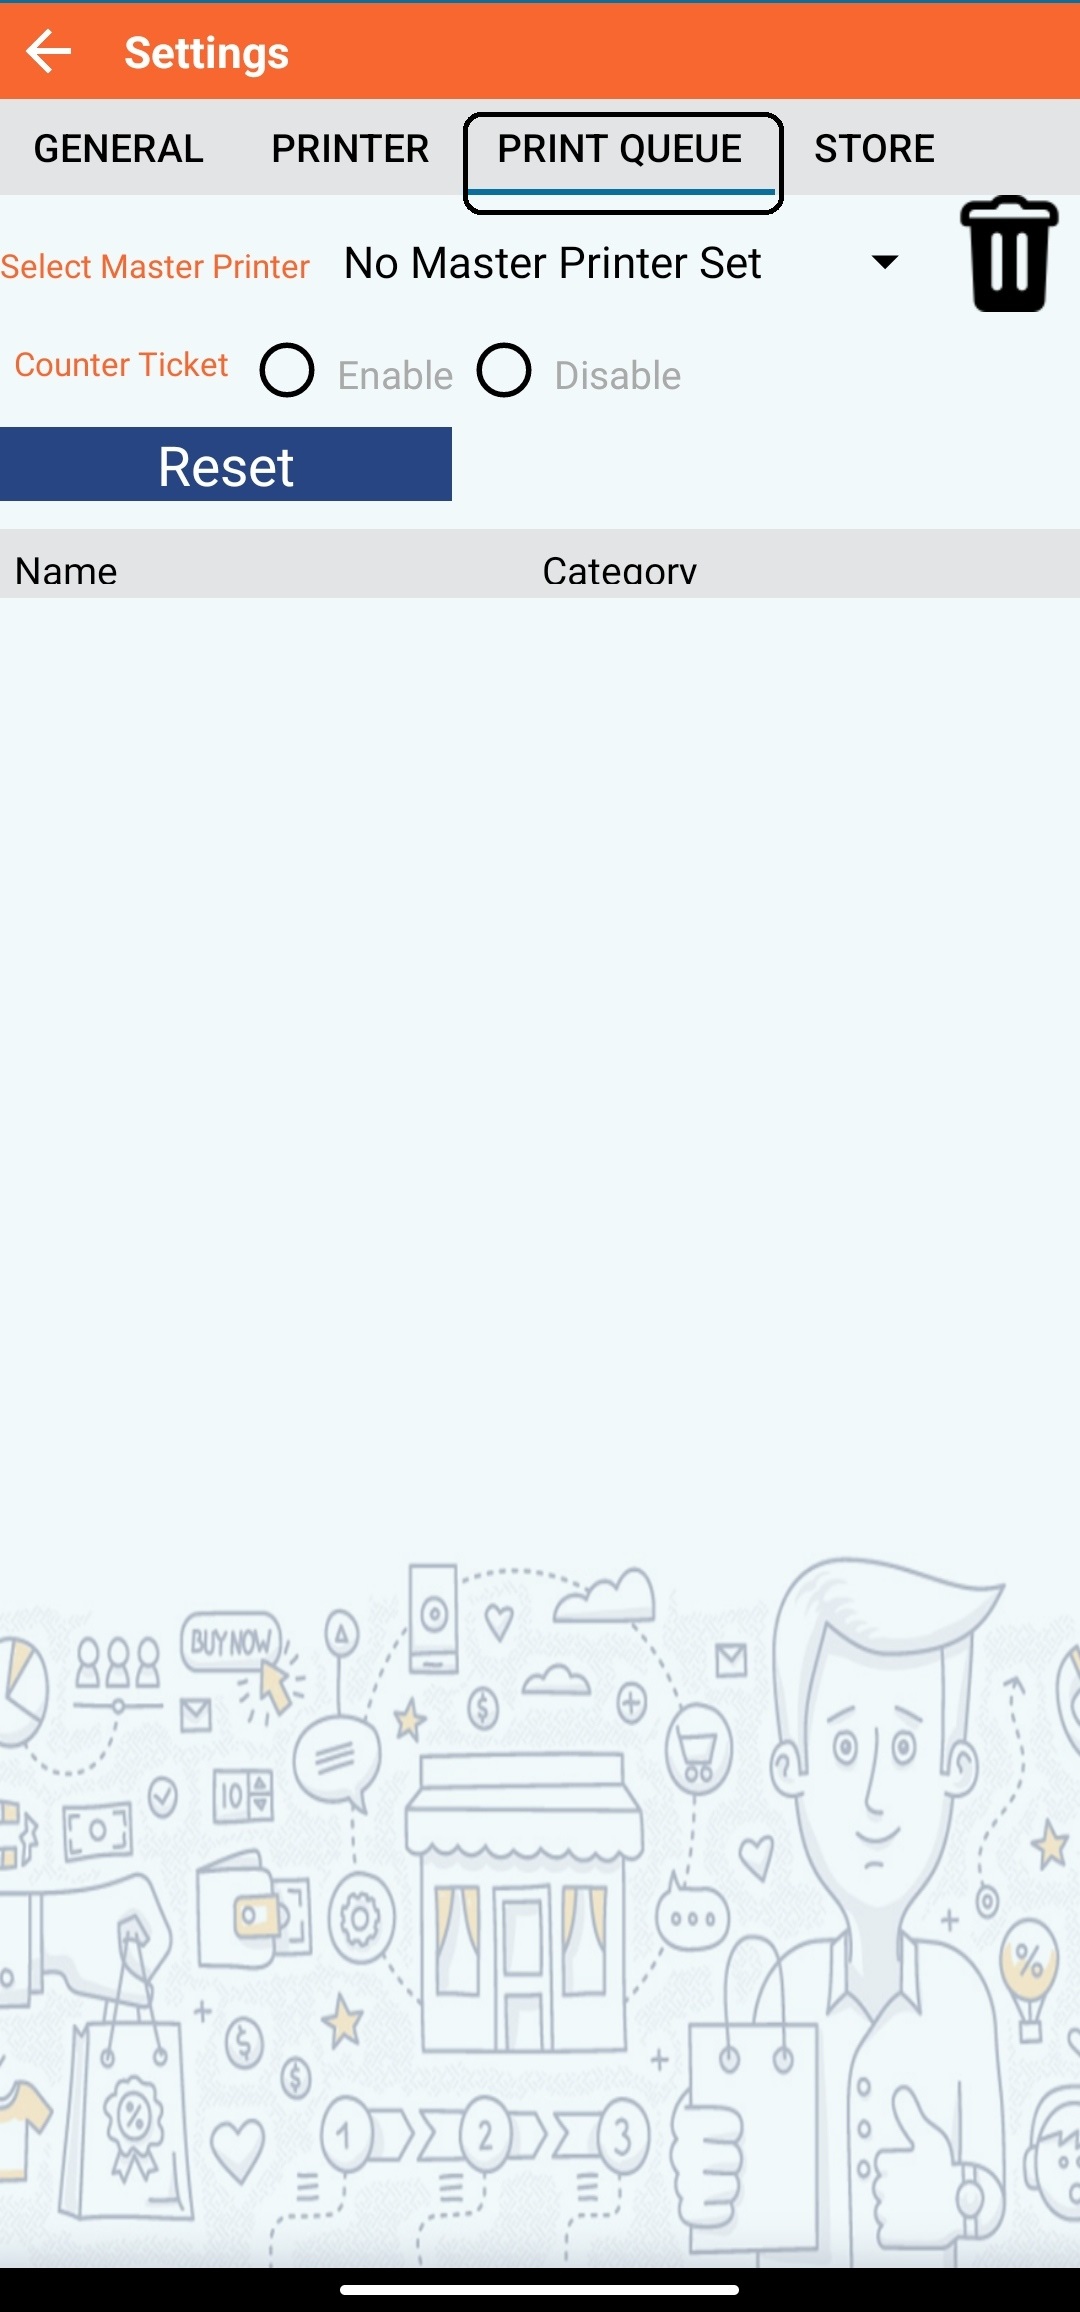
Print Queue Settings
In the Print Queue column, you can manage the master printer and set different printers for different counters or areas in your store. This is useful for managing receipts and tracking sales in different parts of your store.
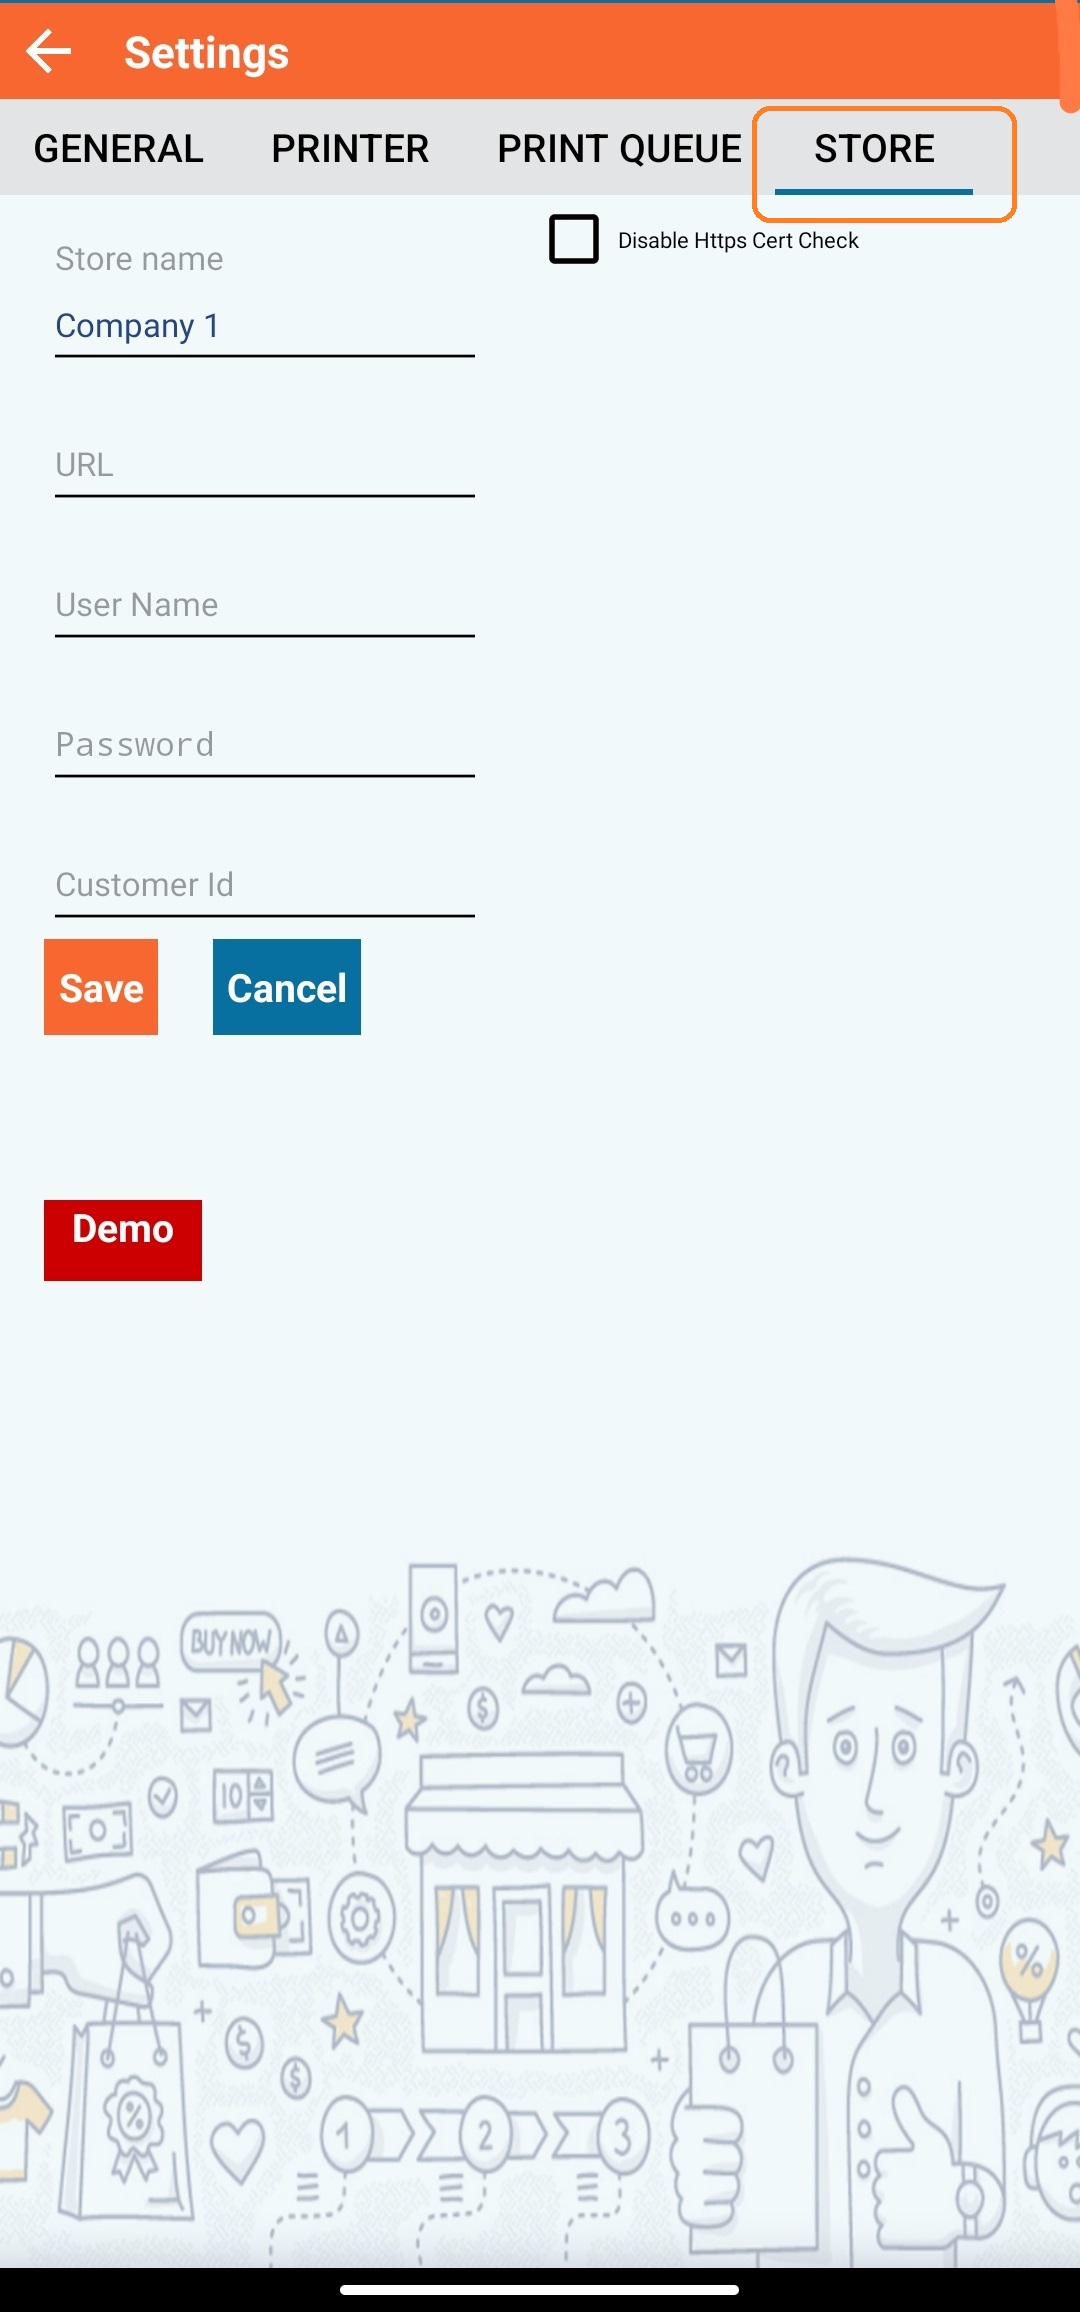
Store Settings
In the Store column, you can input your store's name and select the store you want to log into within the POS application.
Order History
The Order History option allows you to view a list of all previous orders placed through the application. This can be useful for tracking sales, customer purchases, and identifying any trends or patterns of the POS application. To access the Order History:
- Click on the "Order History" option in the POS application.
- A list of all previous orders will be displayed.
- You can view details about each individual order, such as the products purchased, total cost, date of order, and more.
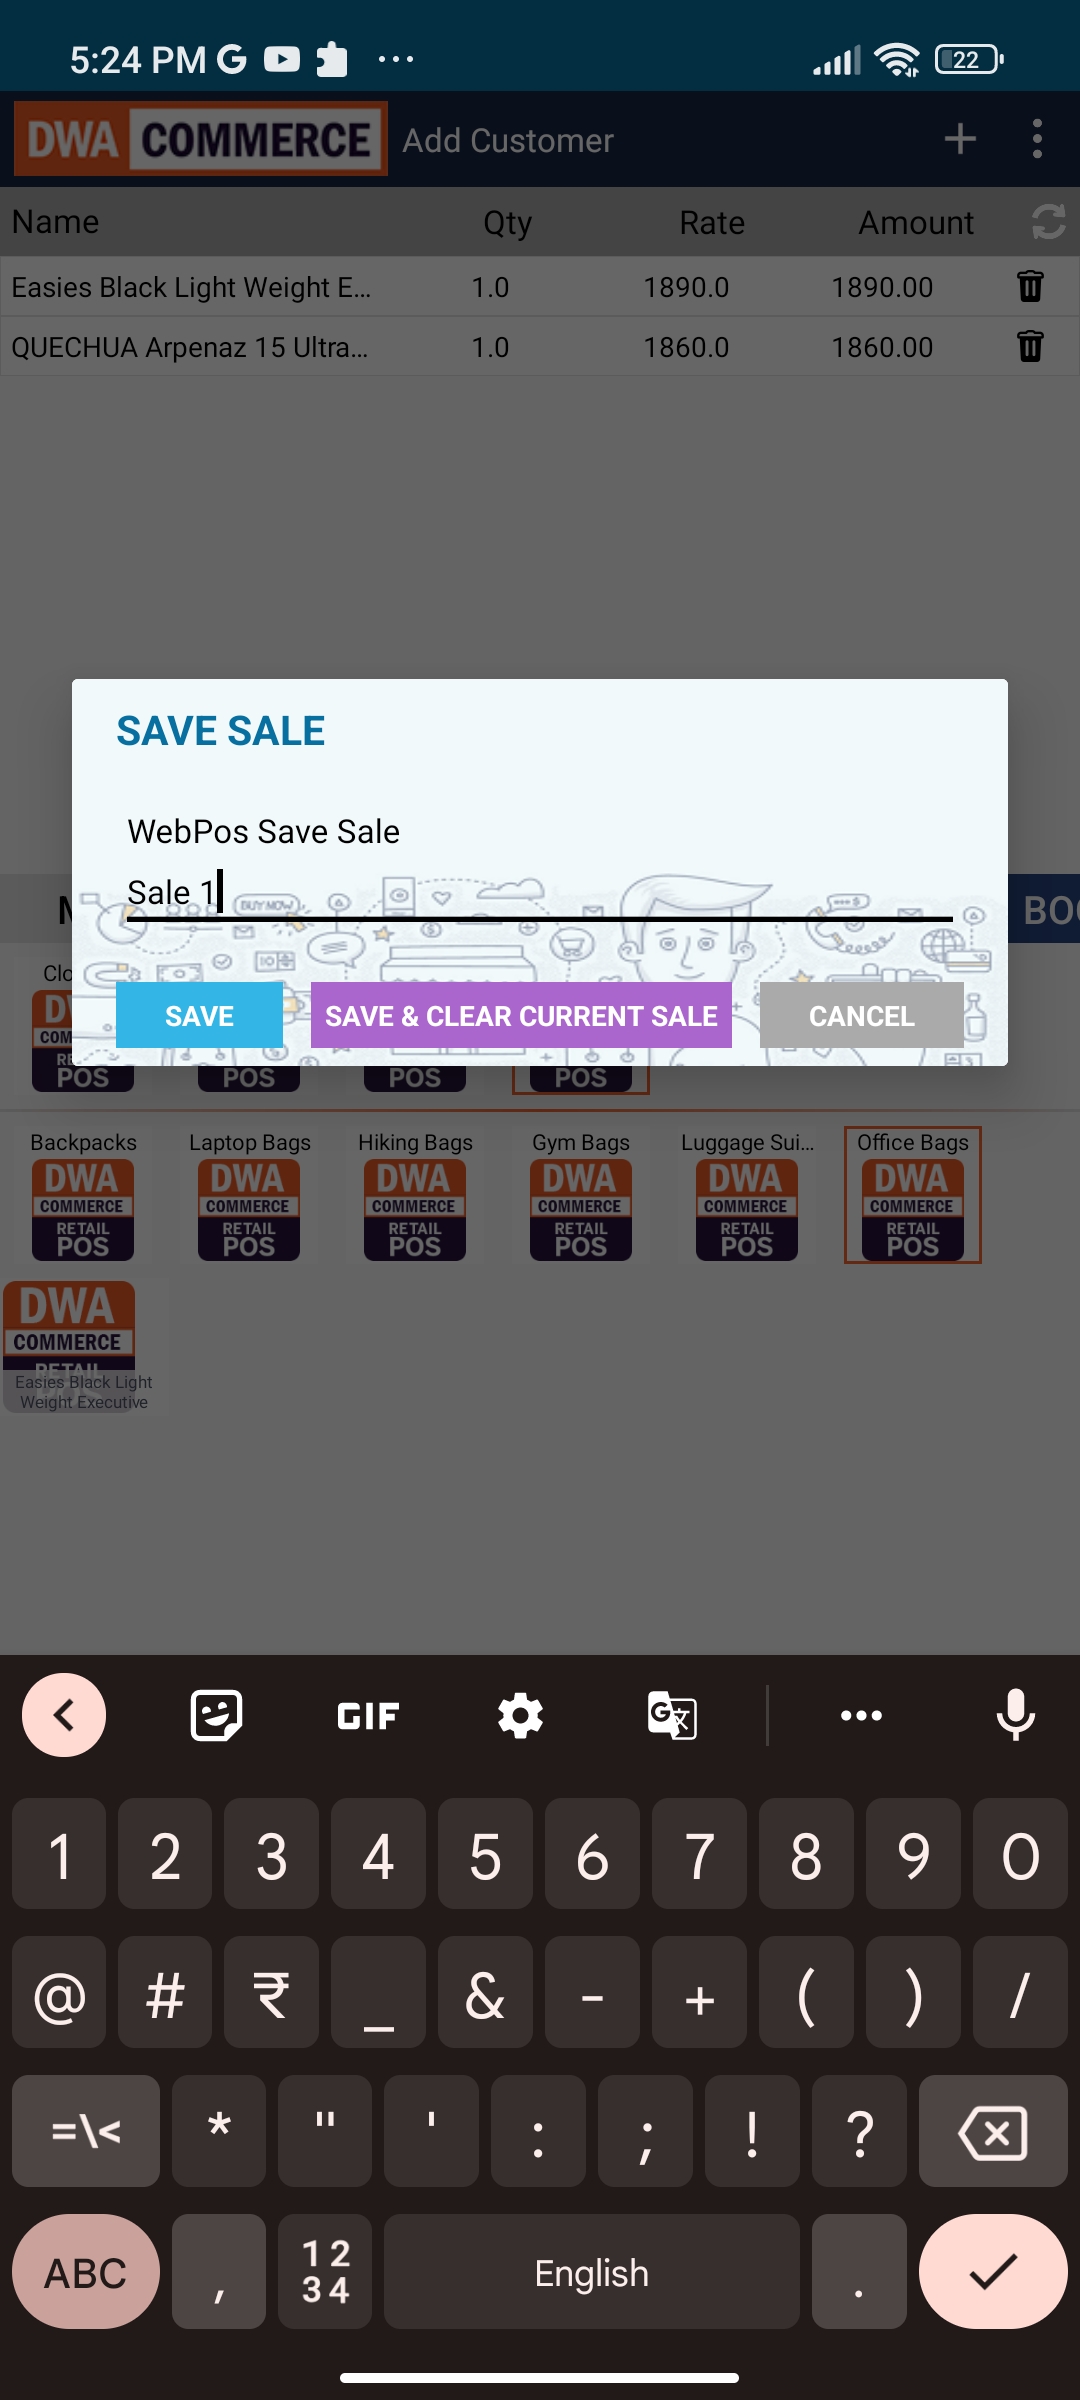
Save Sale and Load Sale
The Save Sale feature in the Retail POS application allows you to temporarily save a transaction and complete it at a later time. This can be useful if a customer needs to leave the store before completing their purchase or if you need to put an order on hold while processing other transactions.
To save a sale order:
- Add the products to the inventory.
- Click on "Save Sale Order".
- Give a name to the sale (e.g., "Sale1").
- You will receive a confirmation message stating that the sale has been saved. Click "OK" to continue.
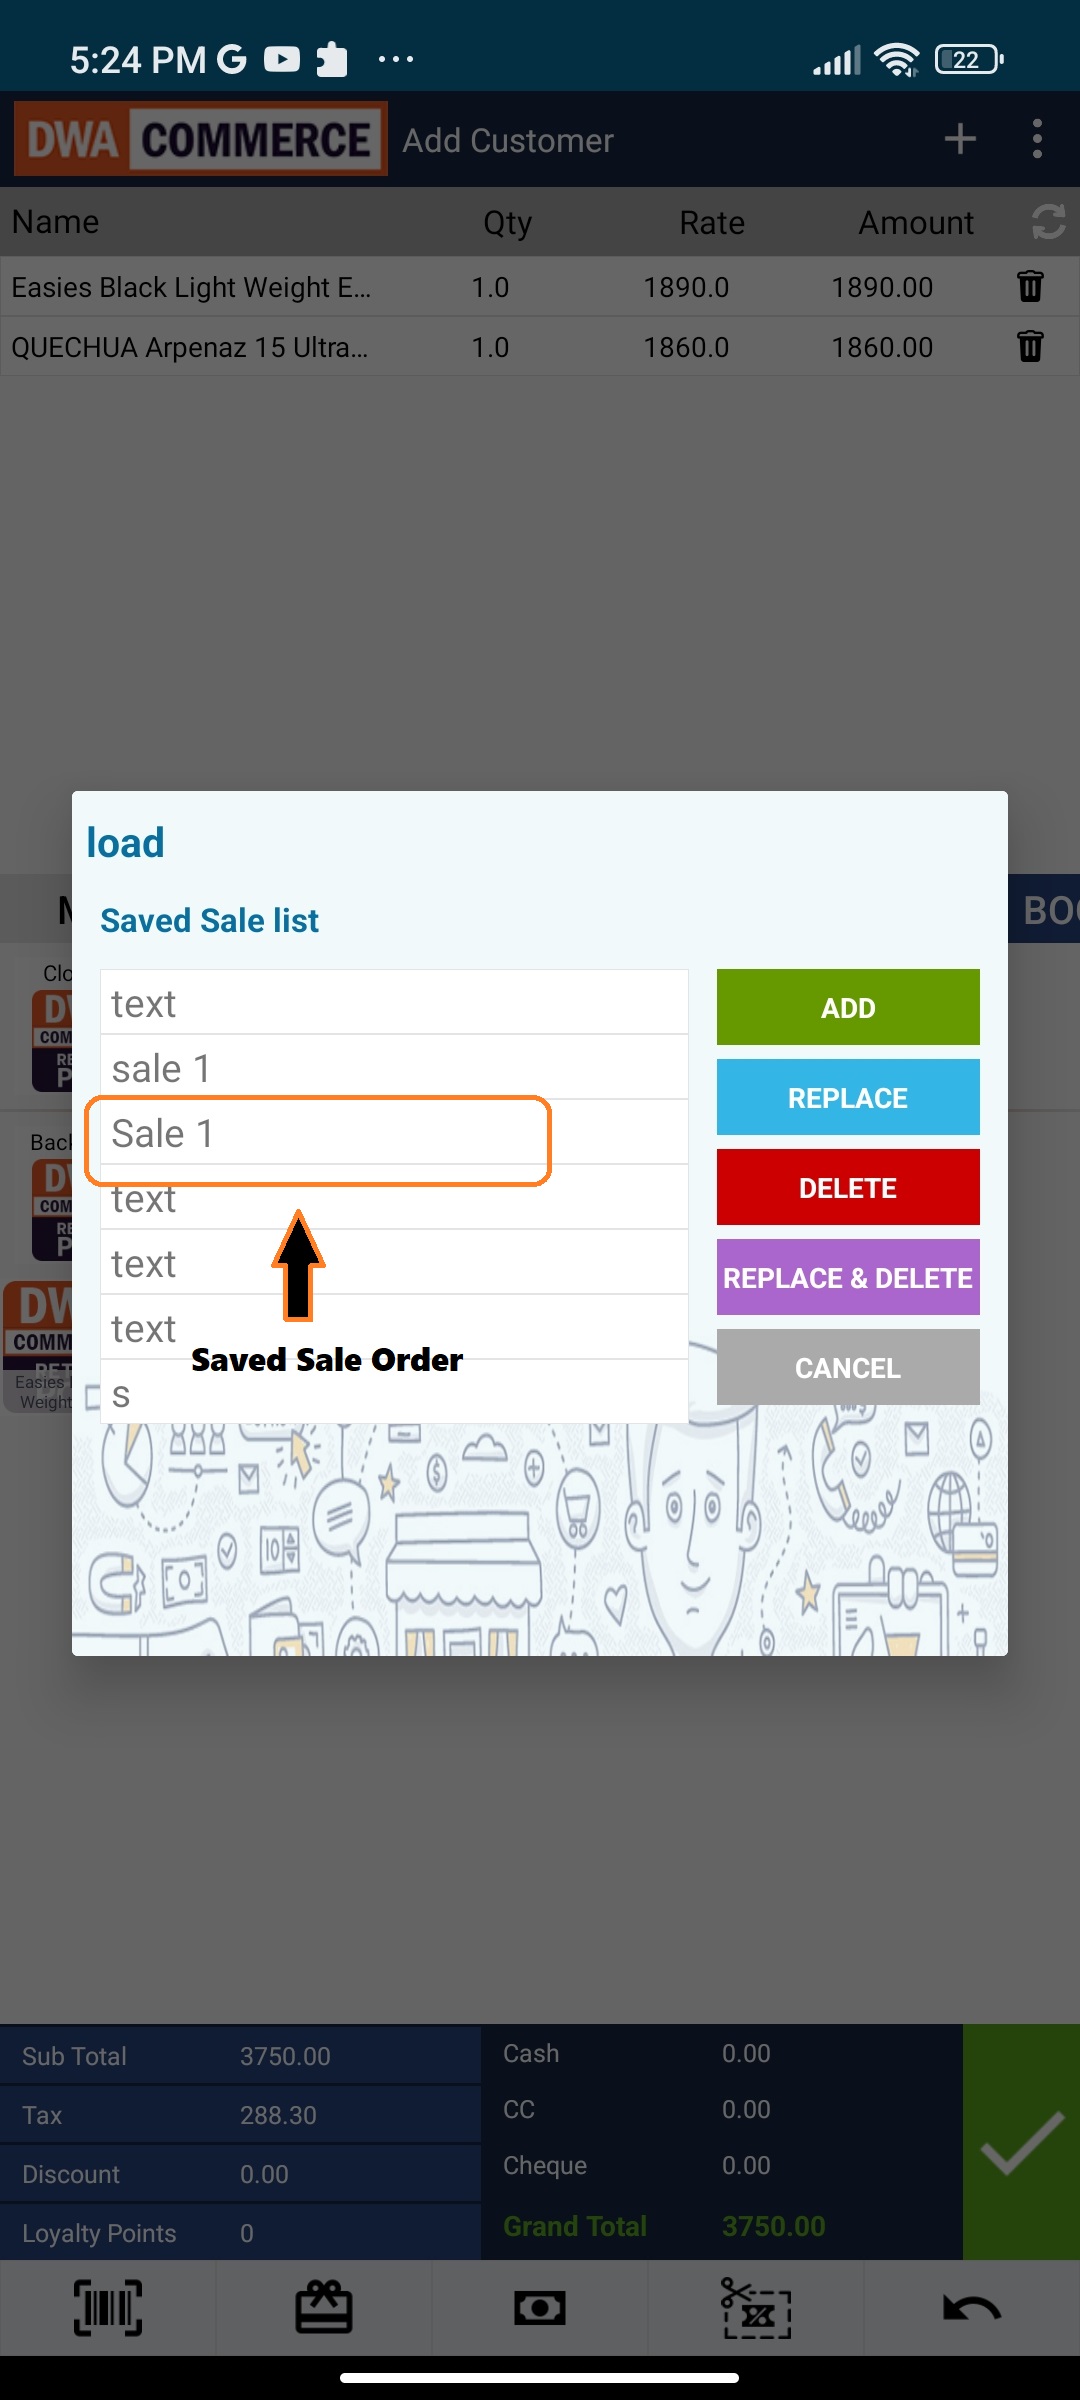
The Load Sale feature allows you to retrieve and complete transactions that were previously saved using the Save Sale feature. To load a saved sale:
- Click on "Load Sale" in the application.
- Select the sale order you want to retrieve.
- Click on "Add" to add the order to the inventory.
- You can make any necessary changes to the transaction, such as adding or removing products.
- When you are ready to complete the transaction, proceed with the regular checkout process.
Signing Out
The Sign Out option in the application allows you to end your current session and log out of the application. To sign out:
- Click on the "Sign Out" option in the application.
- A confirmation window will appear, asking if you are sure you want to log out.
- Click "Yes" to confirm and log out, or click "No" to cancel the logout process.
If you have any further doubts or questions, please contact the DWA support team for assistance.