
Order Processing
A Comprehensive Guide to Using the DWA Commerce Retail POS Application
Welcome to DWA Commerce! In this documentation blog, we will provide you with a detailed guide on how to effectively use the DWA Commerce retail Point of Sale (POS) application. This blog serves as a written version of the video tutorial series, focusing specifically on how to process an order using the application. Whether you prefer reading over watching videos or simply want a written reference, this guide will help you navigate through the features and functionalities of the DWA Commerce POS application.
Getting Started:
Upon opening the app for the first time, you will be prompted to enter a URL, username, password, and customer ID. Fill in the required information and click "Save" to proceed.
After saving, you will arrive at the login page. Enter your username, password, and select a store or terminal. We will cover how to determine the store you are logging into and how to change stores in the second part of this tutorial.
Adding Customers:
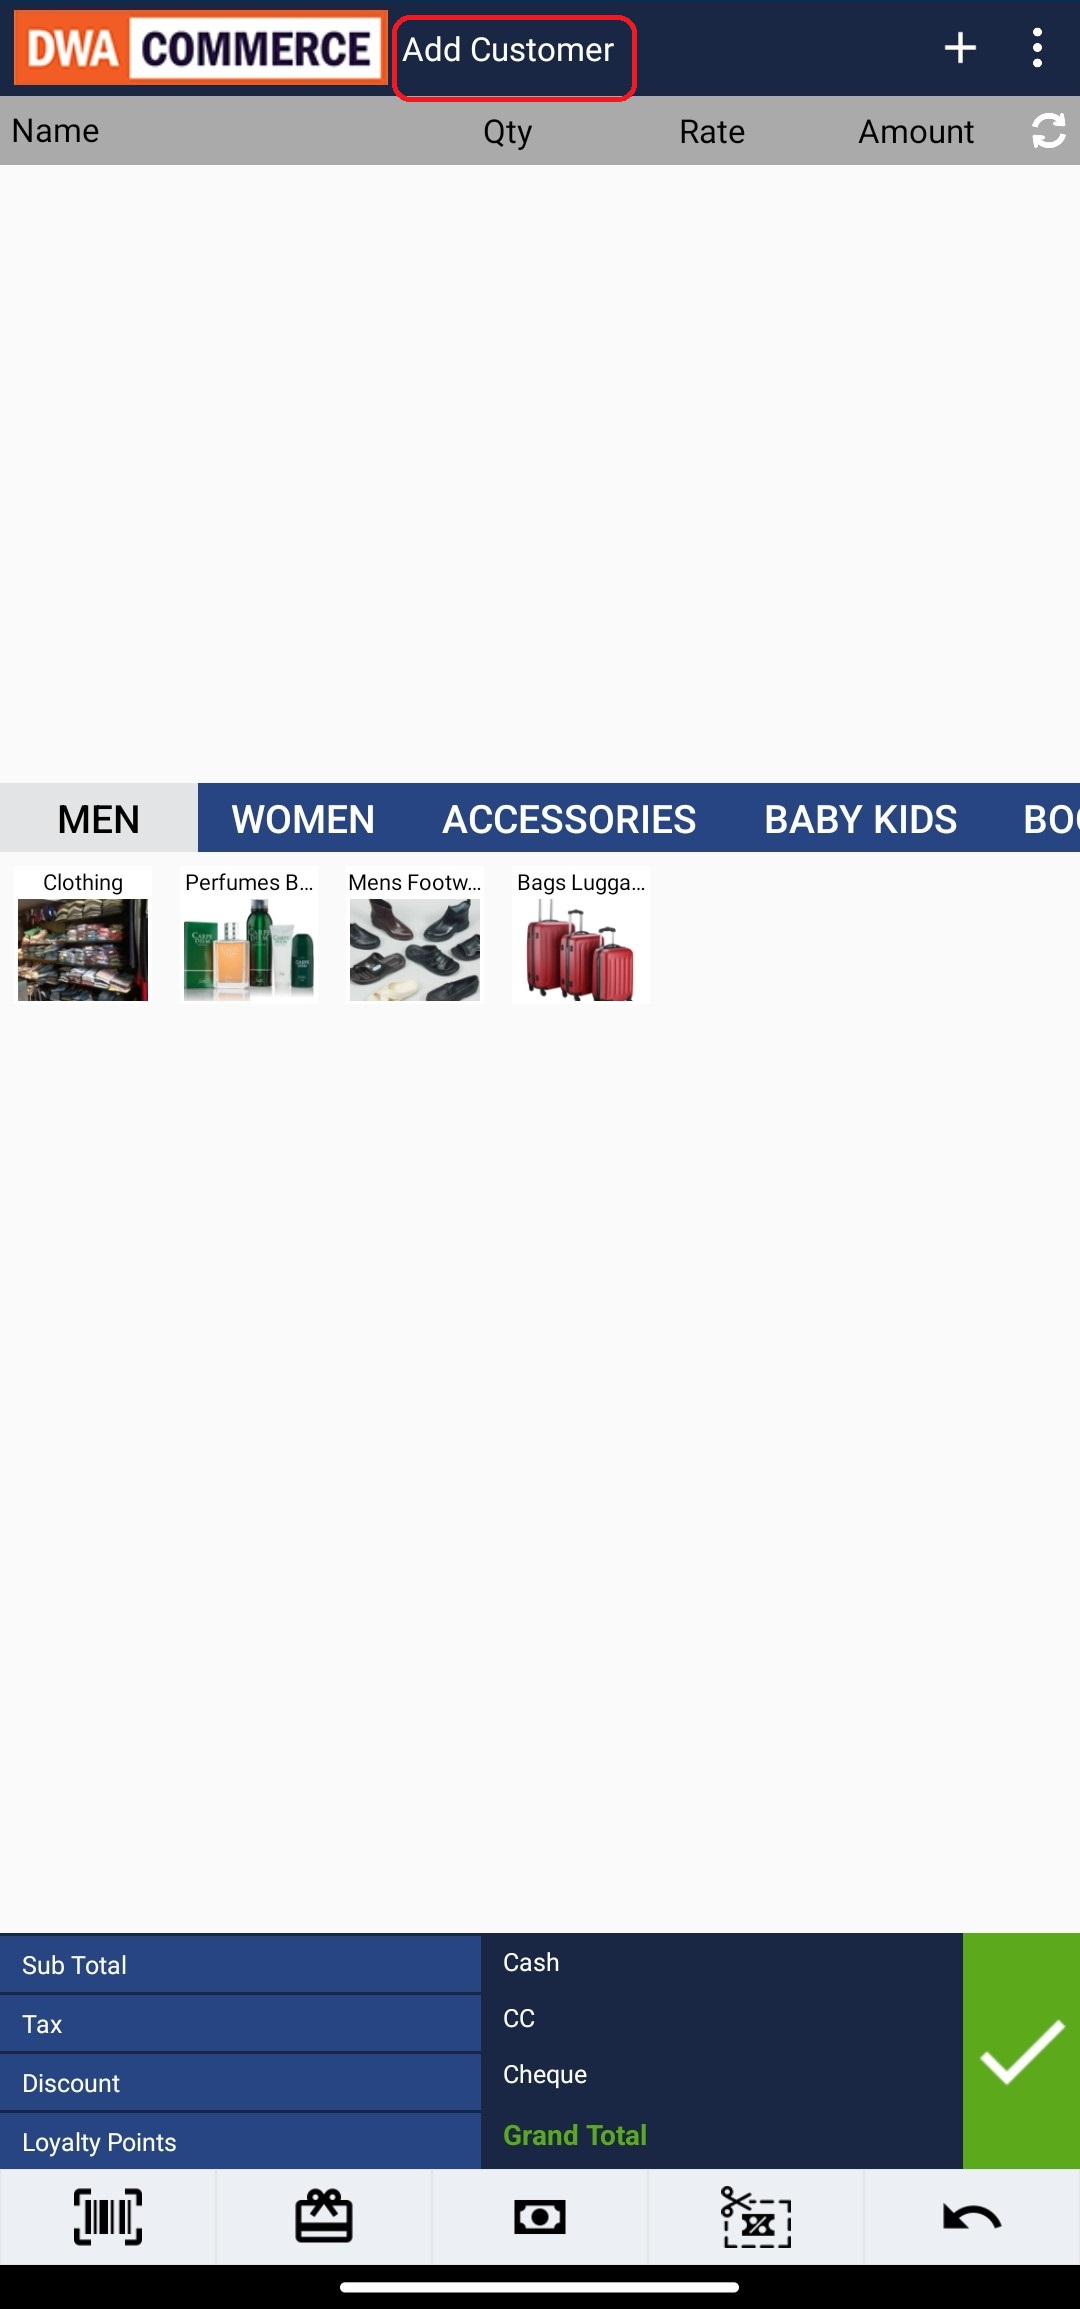
Once logged in, you will be directed to the main page. To track customer purchases and provide personalized experiences such as loyalty programs, discounts, and customized promotions, you can add customers to the POS application.
Click on the "Add Customer" title in the header.
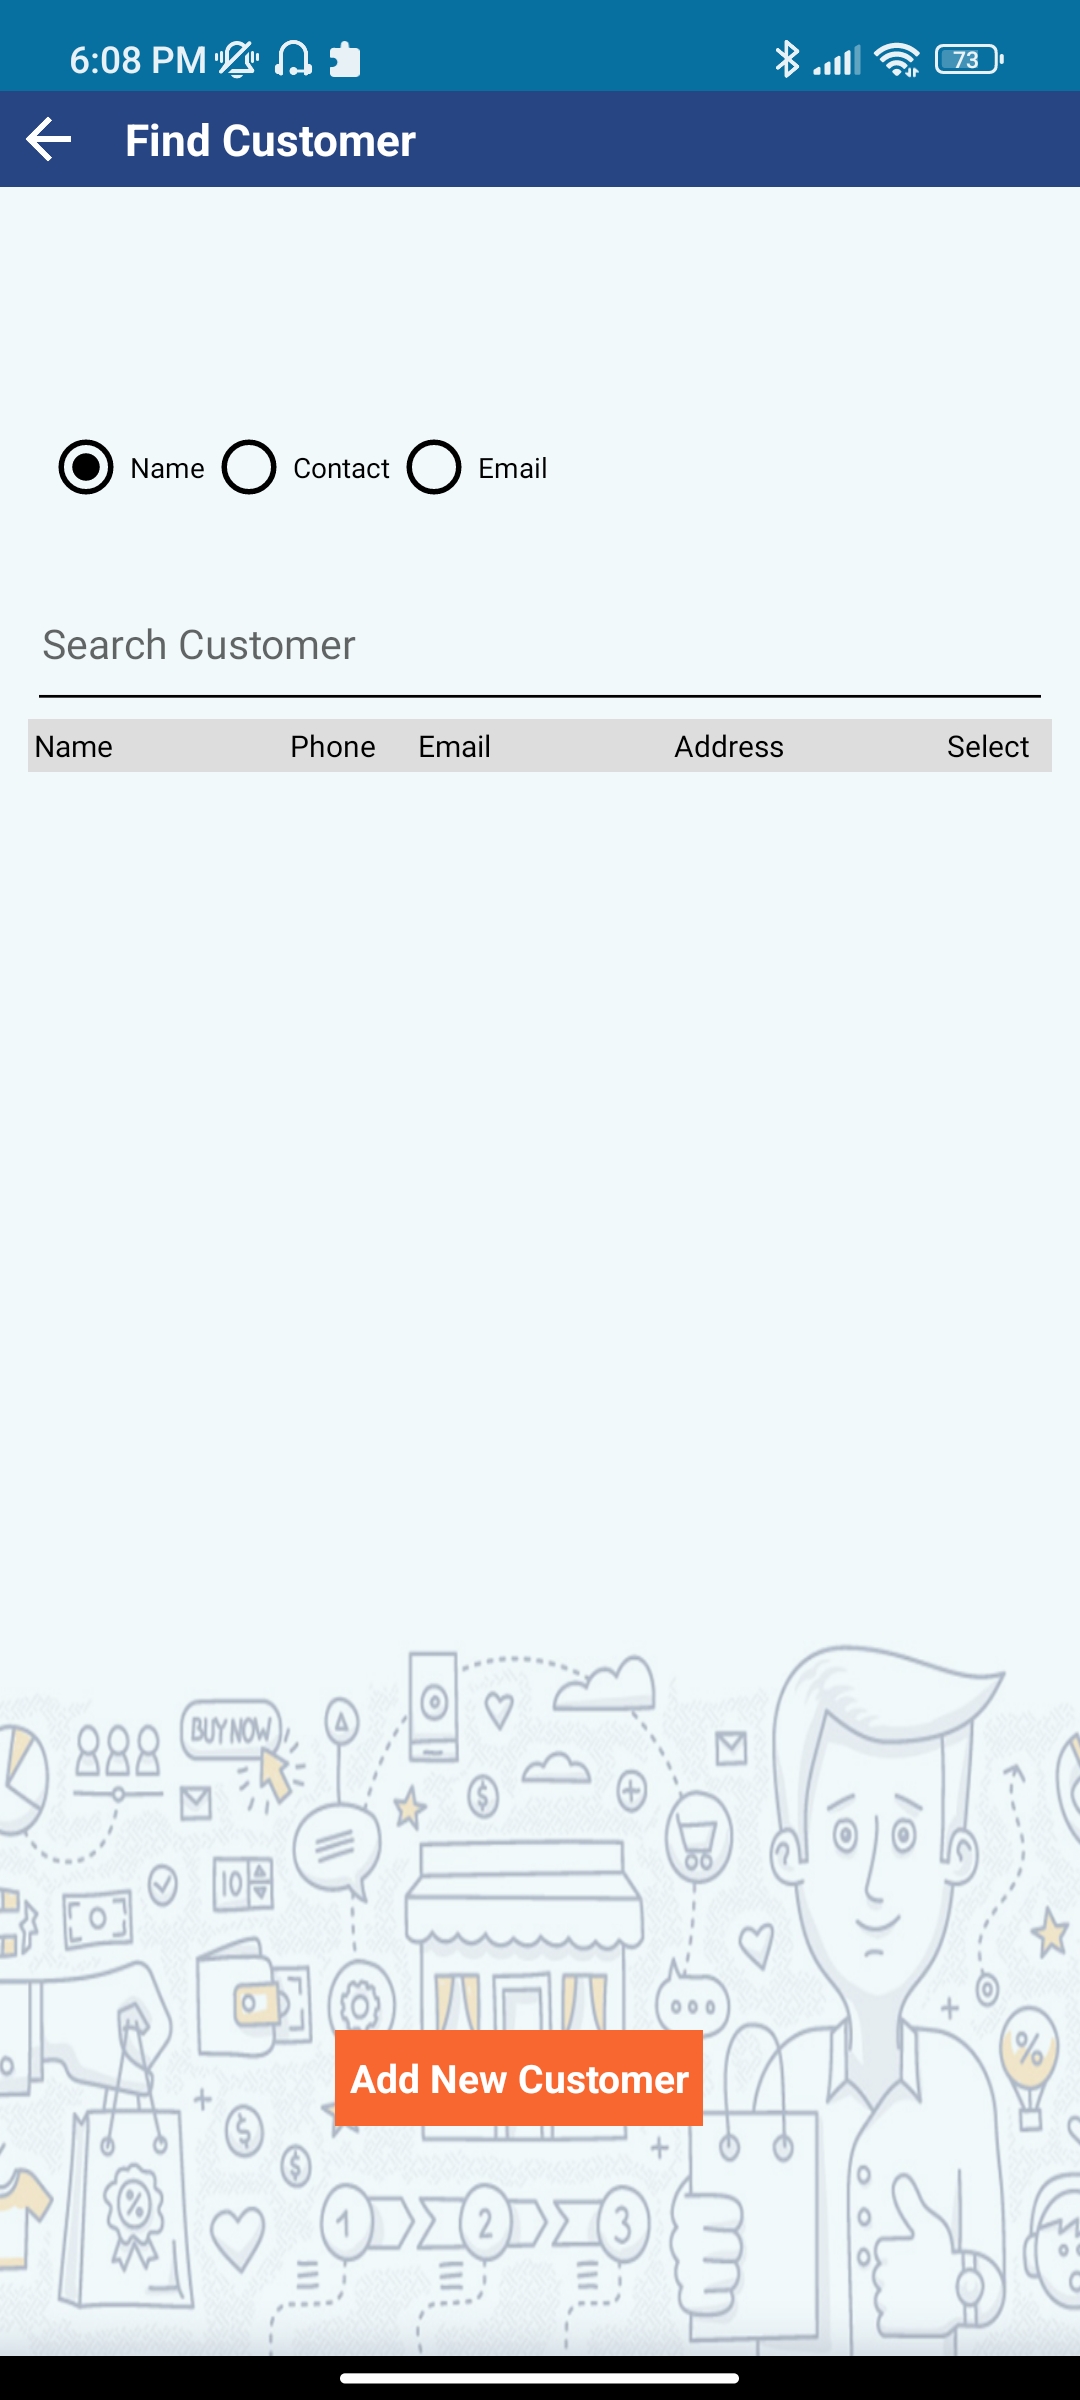
- If the customer is new, click on the "Add New Customer" button and fill in their details. If the customer is already in the system, search for their name, contact information, or email.
- Select the customer from the search results by clicking on the radio button next to their name.
Processing a Sale Order:
To process a sale order, you need to add the items the customer is purchasing to the transaction.
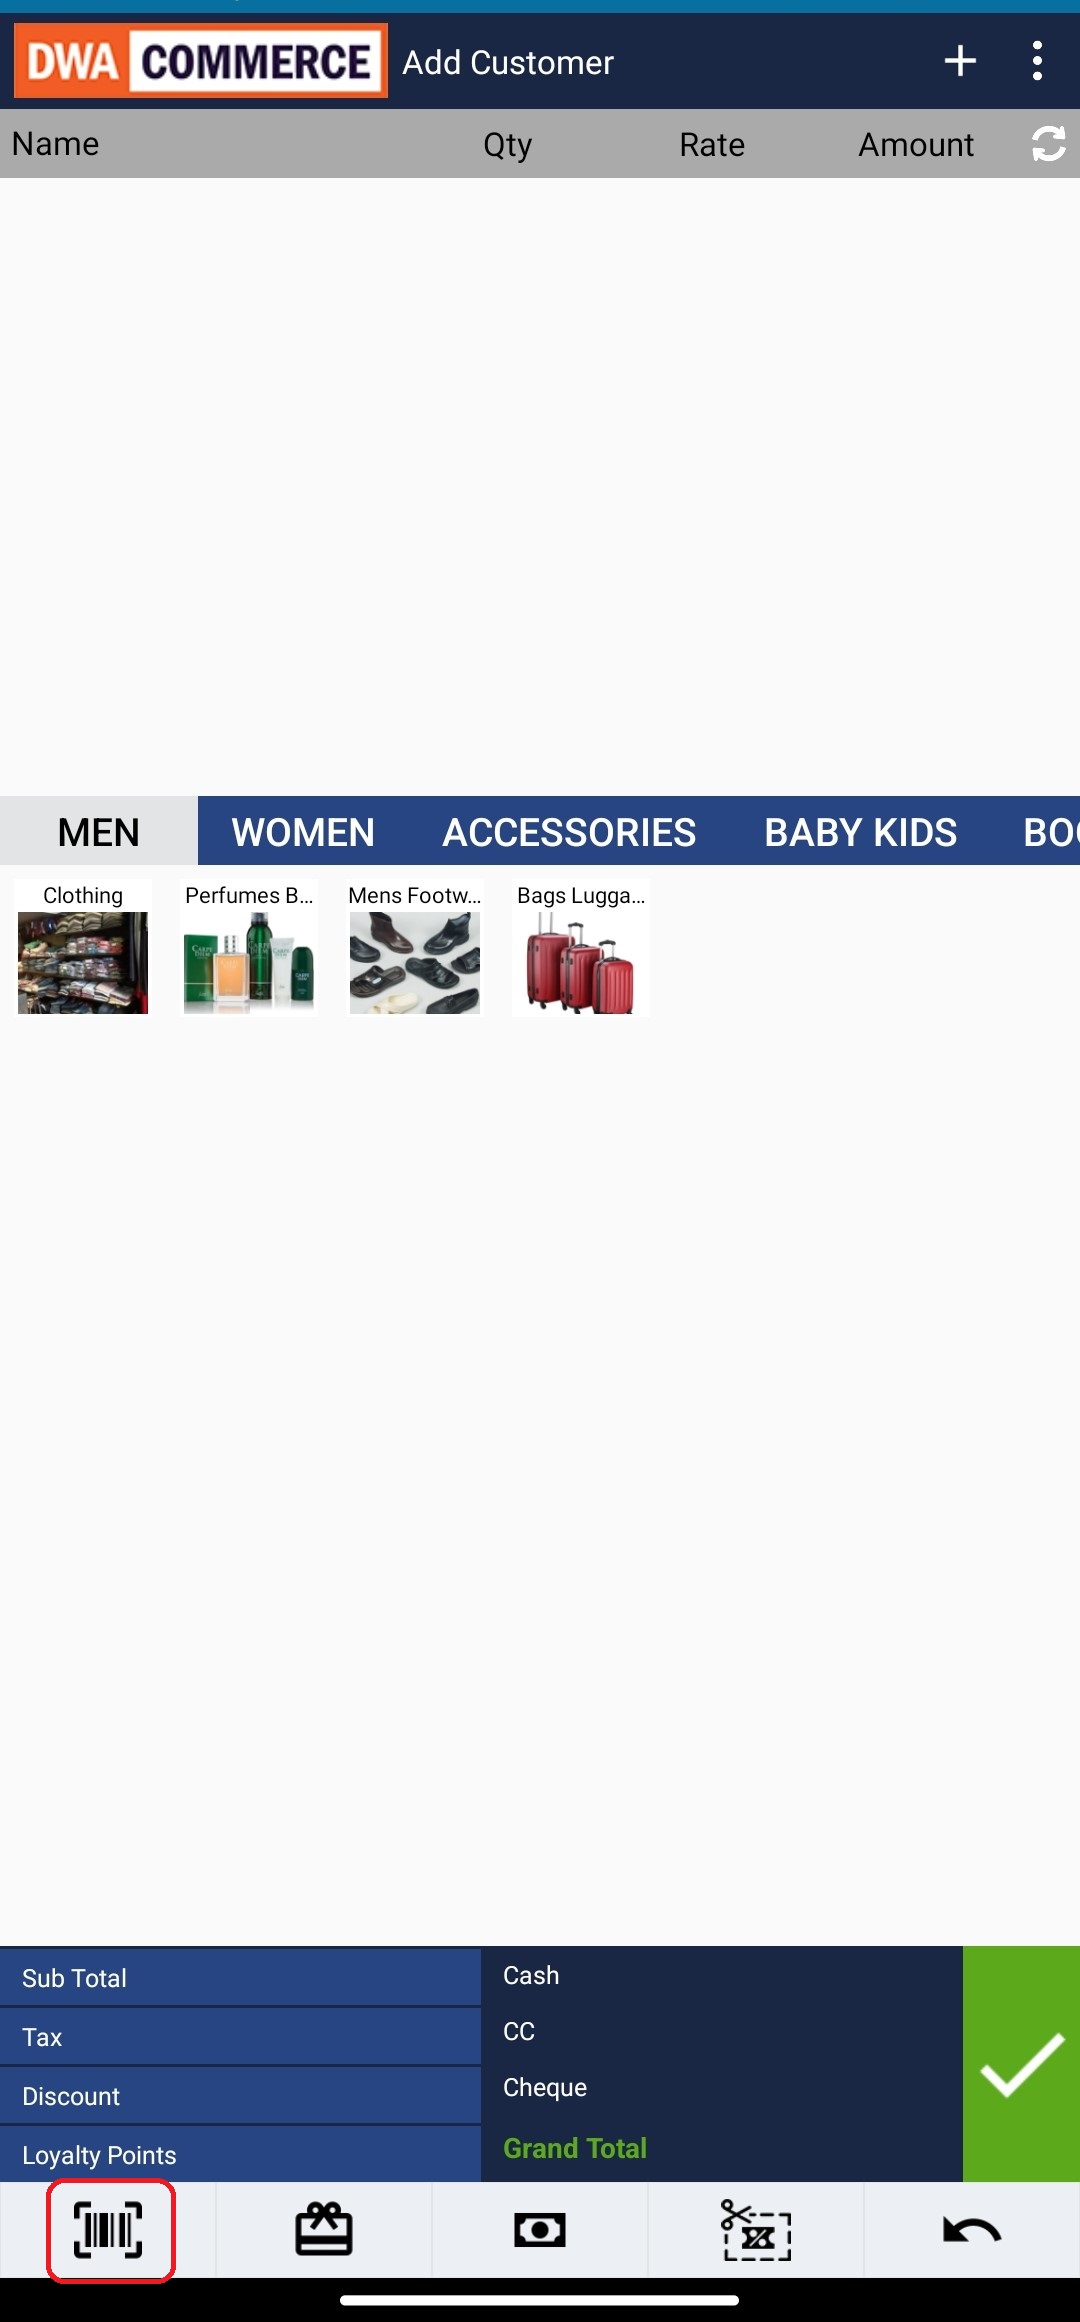
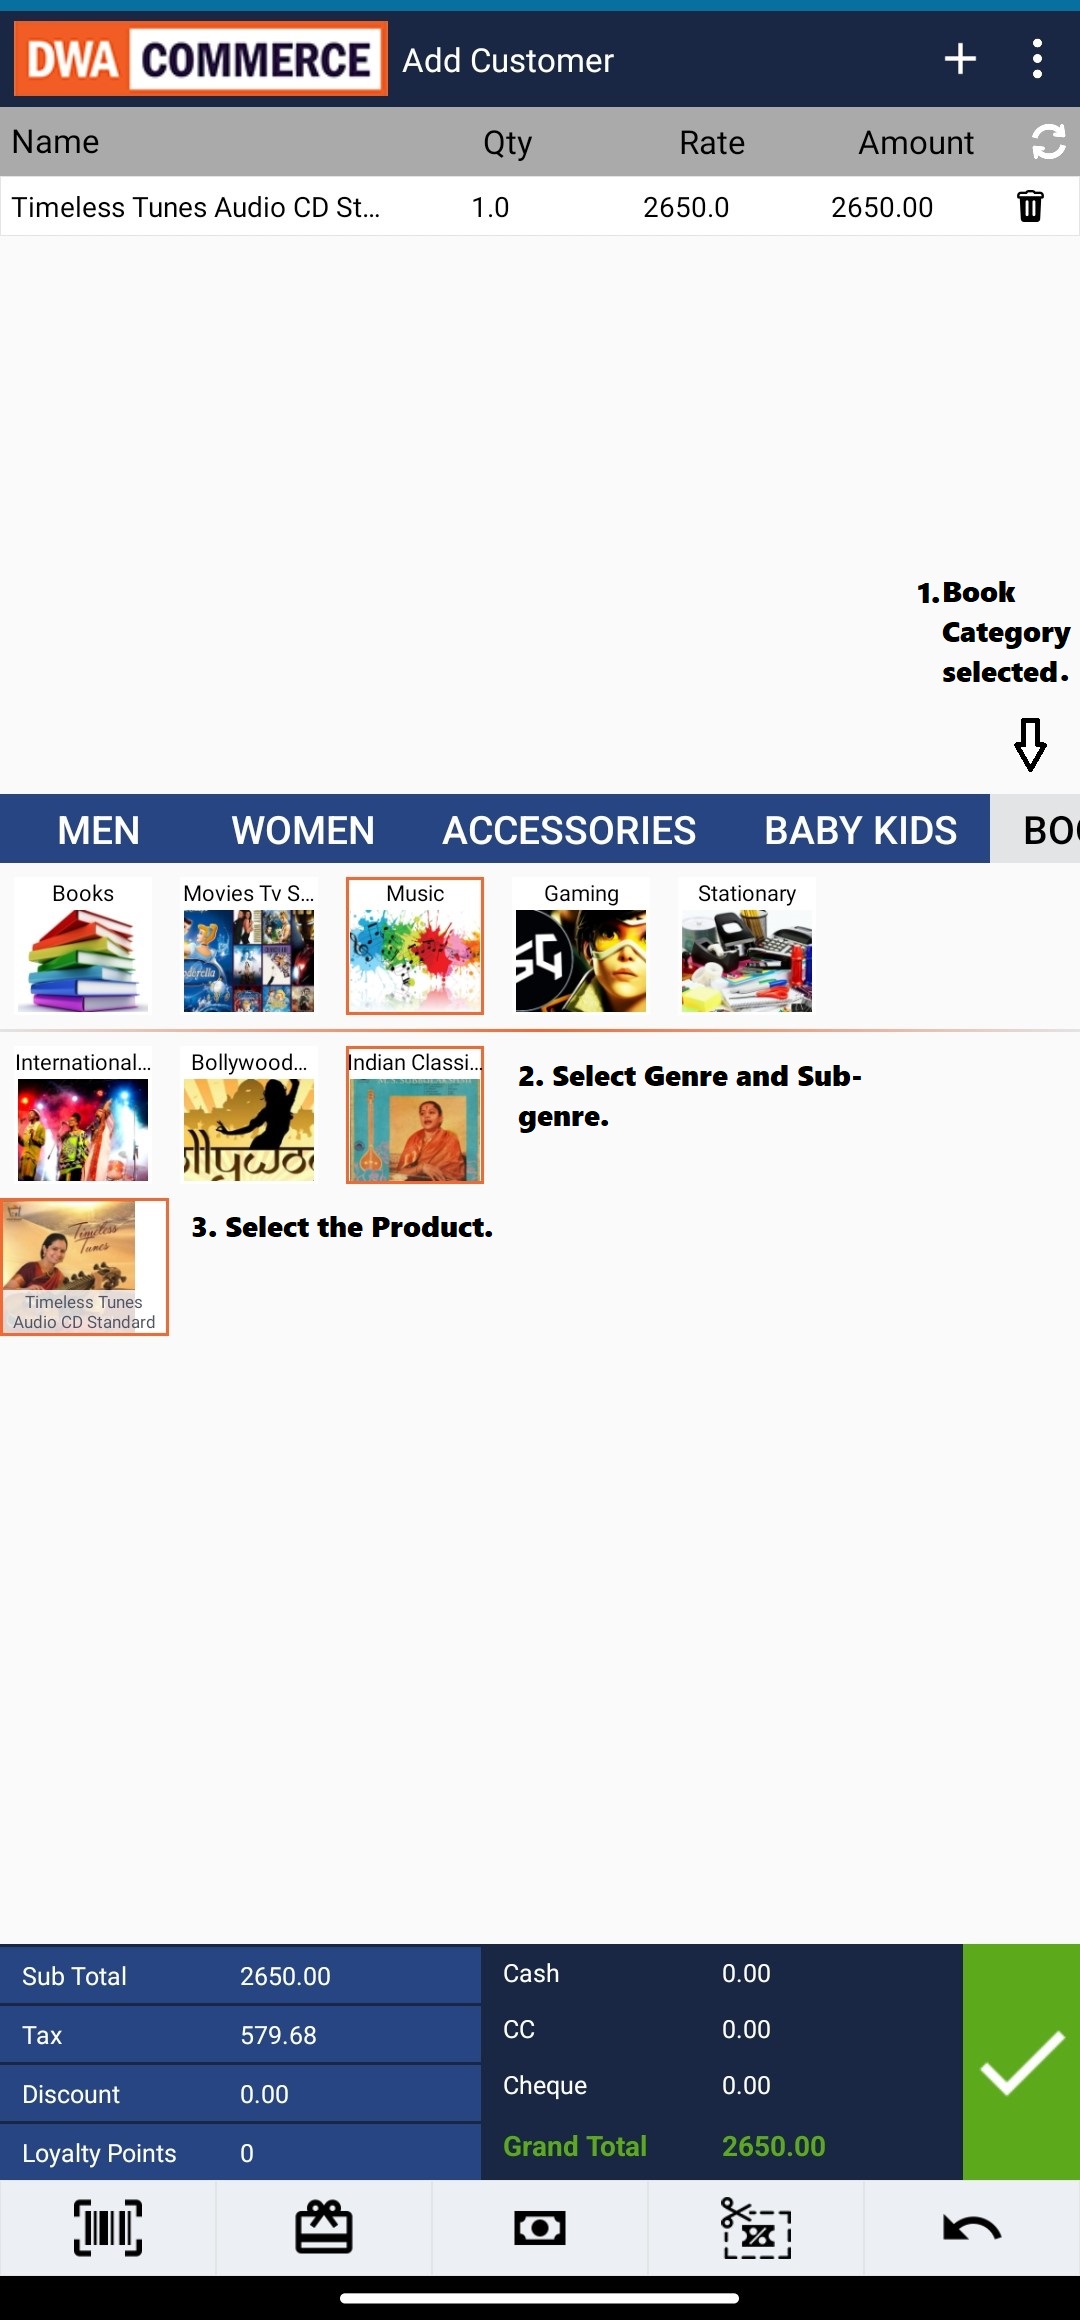
There are multiple ways to add products to the cart:
- Barcode Method: Tap on the barcode icon and scan the item's barcode. The product will be automatically added to the cart .
- Name Method: Tap on the plus icon and enter the product name in the search field. From the suggestions, select the desired product to add it to the cart.
- Category Method: Tap on the relevant category, such as "Accessories," then select the subcategory, such as "Watches." Finally, choose the specific product to add it to the cart.
Applying Promotions and Loyalty Points:
- After adding products to the cart, you can apply promotions, loyalty points, discounts, and offers.
- Click on the gift icon next to the barcode icon in the footer.
- Make sure you have added a customer to the transaction before applying loyalty points or discounts.
- Enter the number of loyalty points you want to redeem as a discount.
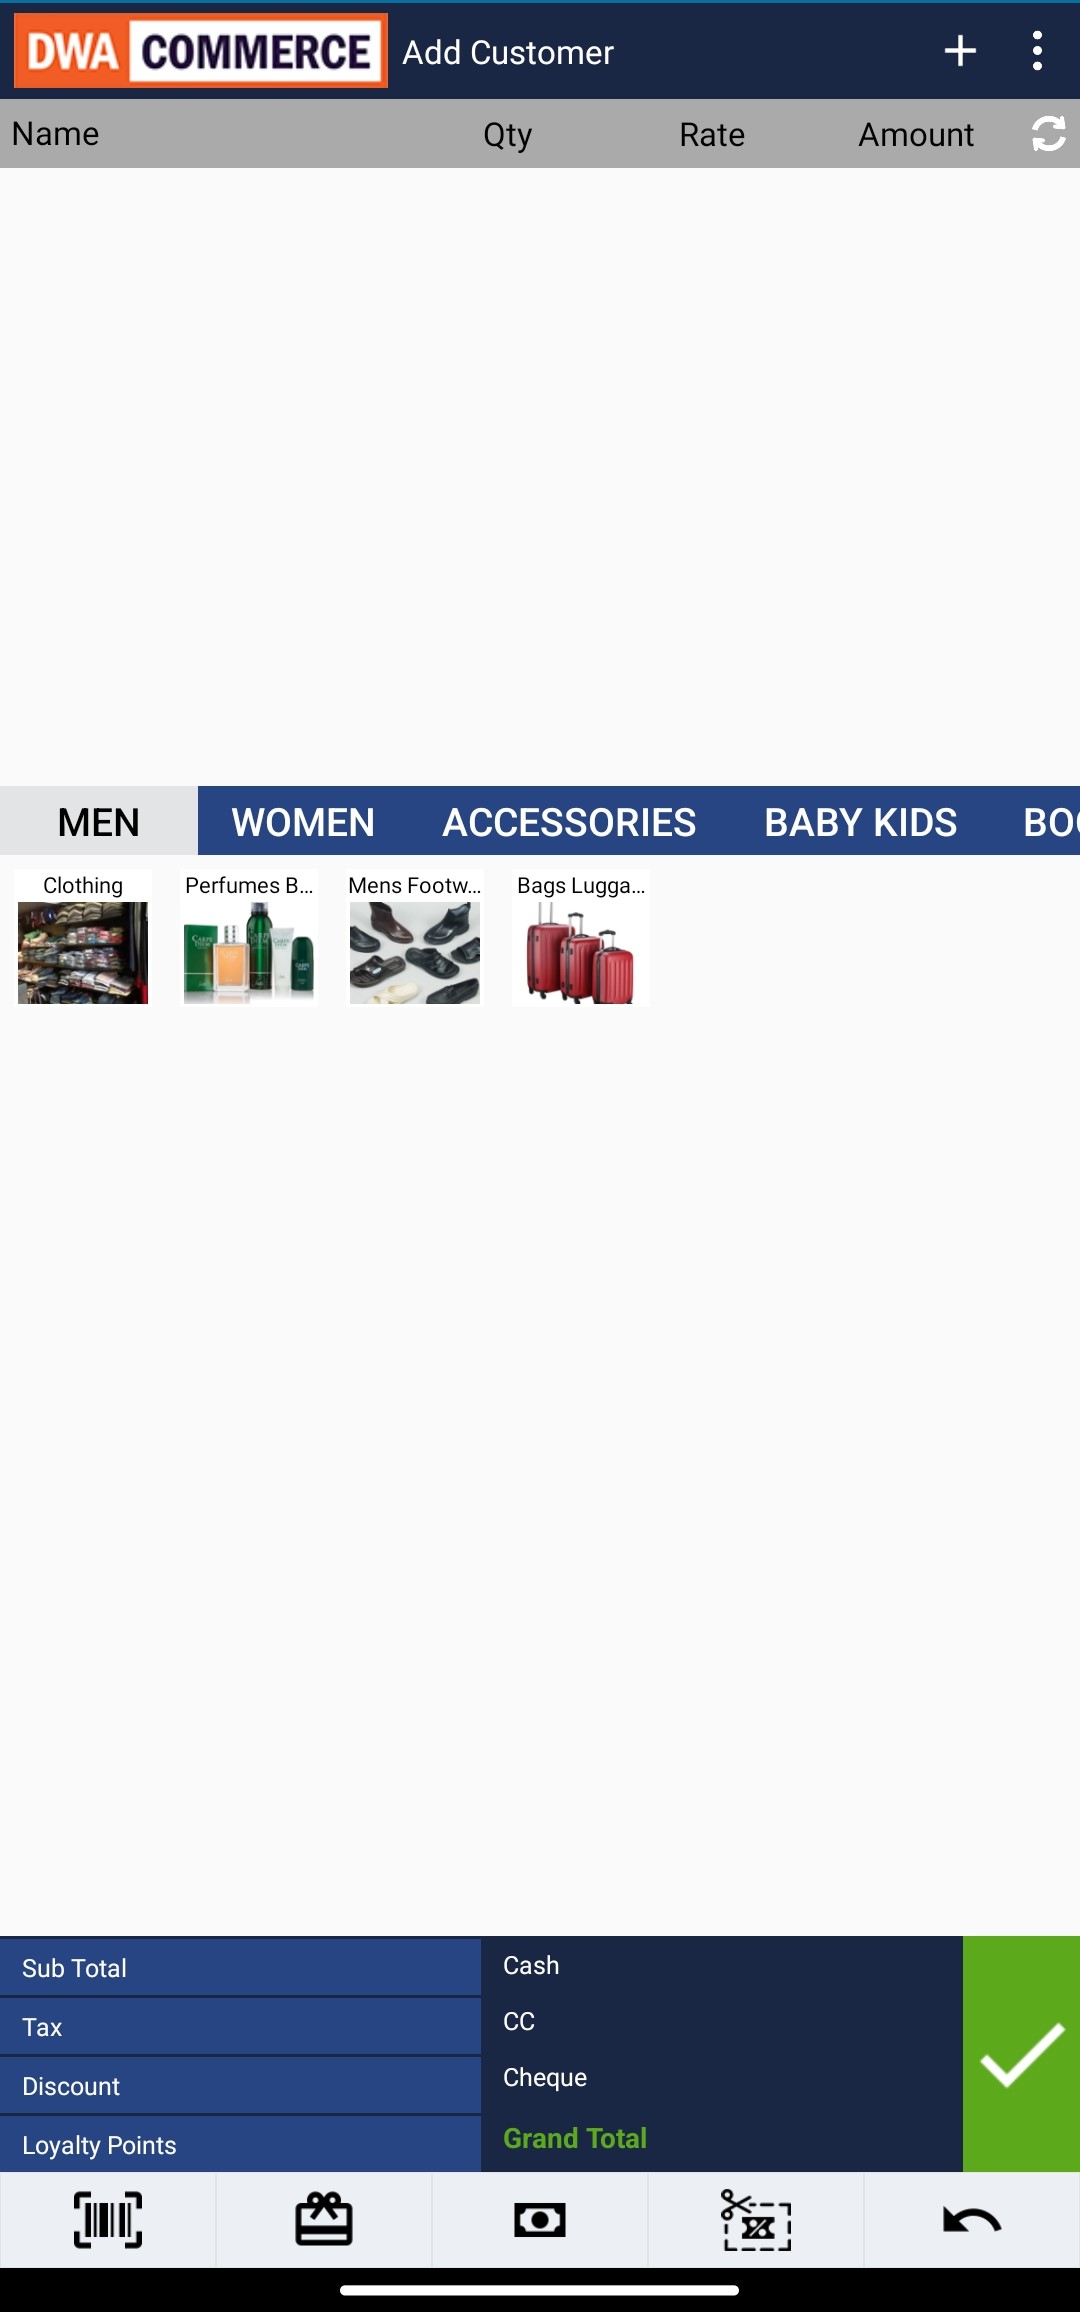
Billing and Payment:
To proceed with the billing part of the transaction, tap on the currency note icon.
On this screen, choose the method of payment: cash, debit/credit card, or bank.
- Select the corresponding checkbox to choose the desired payment method.
- For split tender transactions, select both the cash and debit/credit card checkboxes and enter the respective amounts.
- Complete the debit/credit card transaction by entering the reference number and clicking "Save".

Review the preview of the receipt, which includes the subtotal, discounts, loyalty points, grand total, and payment details.
To finalize the transaction and print the receipt, click the green check button.
Conclusion:
Congratulations! You have now completed part one of the DWA Commerce POS application tutorial. This documentation blog has covered the process of processing an order using the application, including adding customers, adding products to the cart, applying promotions and loyalty points, and completing the billing process. If you have any further questions, please consult the documentation or reach out to our support team.